Puzzle cube Project

Me with my finished puzzle cube prototype.
Define the Problem
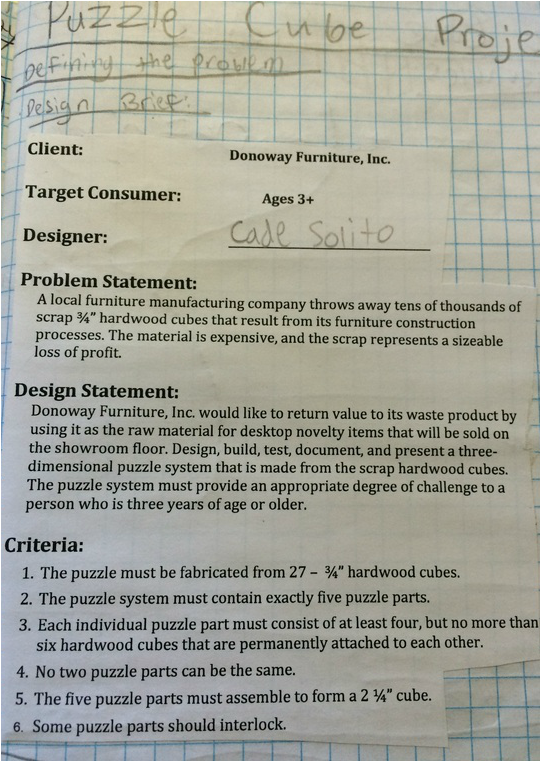
Puzzle Cube Project Design Brief.
Generating Concepts
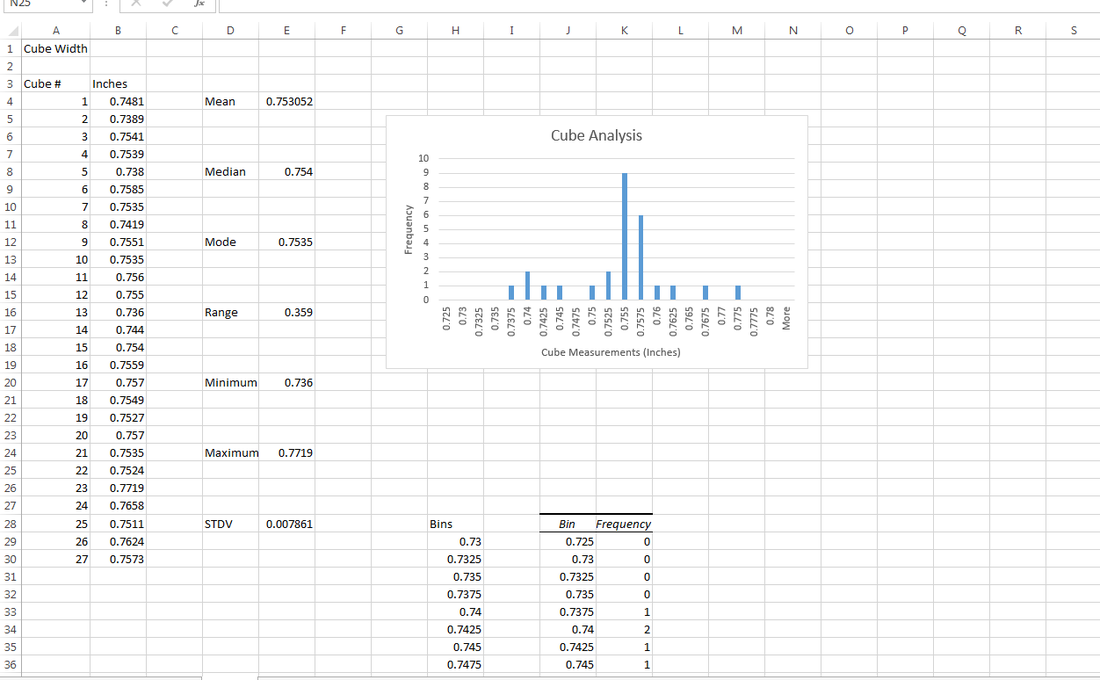
Puzzle Cube Analysis displayed on Microsoft Excel.
The reason or purpose of measuring every single cube being used in my puzzle cube prototype (and creating and displaying several forms of central tendencies) was to create a visual to help me understand the general or average size of the cubes being used - and knowing this in advance of the project helped me with several steps of the design process including Generating Concepts (Knowing what size of cube you have to work with when thinking of ideas for a solution) and Construct and Build a Prototype (Putting similar size cubes in same puzzle cube piece when constructing and building prototype).
Standard Deviation (as shown in the document above) is the quantity that is calculated to represent the amount of how much a single measurement differs from the mean of a set of data. Standard deviation applies to this project because in this project we can use standard deviation as a figure to show the similarity in size of cubes used in the puzzle cube pieces. Knowing the similarity in size between cubes could benefit one in several steps of the design process including Generating Concepts (Knowing what size of cube you have to work with when thinking of ideas for a solution) and Construct and Build a Prototype (Putting similar size cubes in same puzzle cube piece when constructing and building prototype).
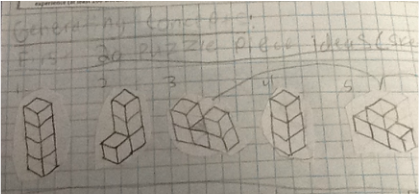
First 5 brainstorm list sketches.
|
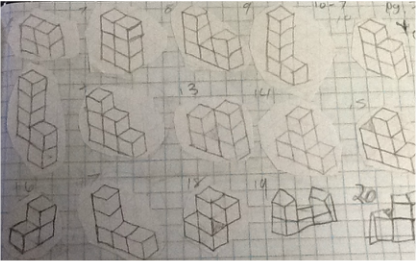
Last 15 brainstorm list sketches.
|
would fit together and follow all of the constraints listed in the design brief. These are some of the sketches of my first ideas of what I would use as puzzle cube pieces. This is a form of brainstorming.( A critical step of generating concepts). Out of all of these ideas I needed to pick 5 that would fit together and follow all of the constraints listed in the design brief. So, I started to look for pieces that did this.
Slideshow of .ipt files of puzzle cube.
Develop a Solution
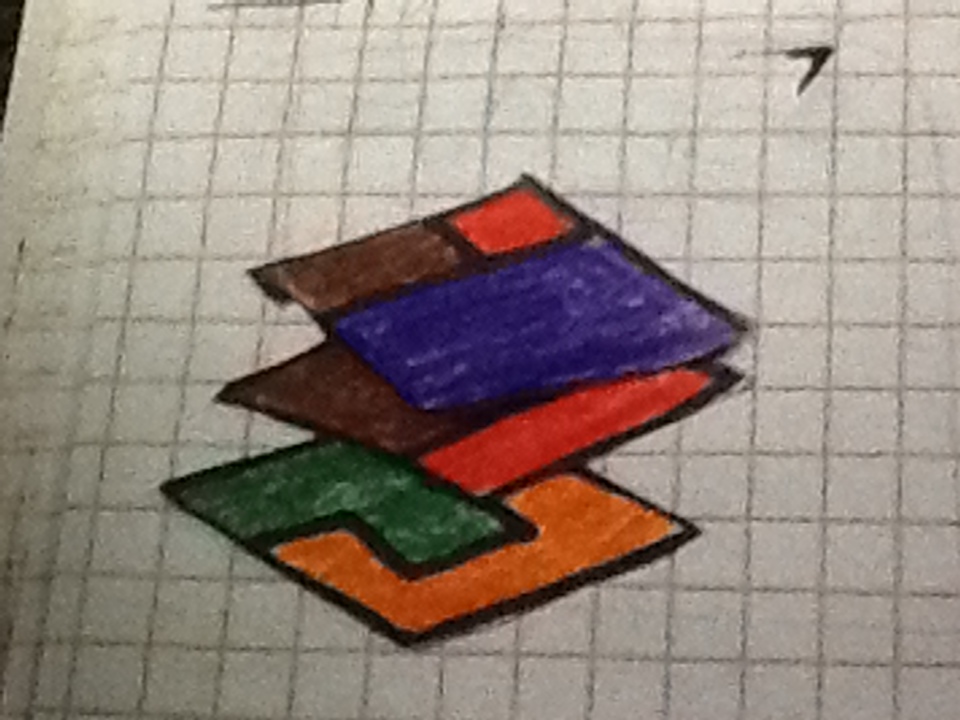
Final "flip book" sketch of puzzle cube.
|
Slide show of .idw files of puzzle cube pieces.
|
Construct and Test a Prototype

Fully Assembled Puzzle Cube.
Degrees of freedom is what tells or shows how much movement an object has based on what faces of the object are constrained to another object or unable to move. Degrees of freedom comes up obtaining to the puzzle cube project because, when modeling the puzzle cube assembly file one needs to know how many degrees of freedom an object has to successfully constrain two parts so the assembly will come together correctly.
Evaluate the Solution
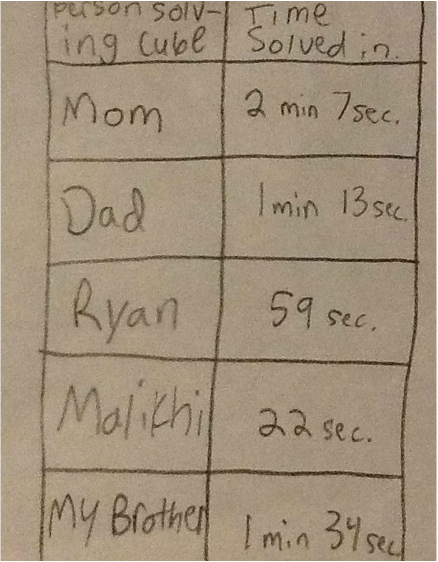
The data for puzzle cube solving times. The mean of the data is 1 min. 15 sec., the median of the data is 59 sec. and the mode is none.
If I had the chance to change anything in my design (if given a longer time constraint), I honestly wouldn't change anything. I would not change anything in my design because my design is simple,easy, and was not time consuming for all for me to build at all. These things are important factors me me because personally, I like a design that fits all the constraints and gets the job done, nothing too overbearing.
Present the Solution
The Puzzle Cube design I made for my project was a simple 3x3 cube with a singular bottom layer made up of two interlocking parts and a middle and top layer that is interconnected using 3 parts. This design was simple yet fit all the constraints listed in the design brief. To come up with this idea, design it, and build a working prototype to complete the project successfully I used the design process.
First, I defined the problem by using a design brief to elaborate all ties of the project and to simply enhance my understanding of what I had to do to complete the project. Next, I knew what the task at hand was, so I had to generate concepts. I generated concepts by rapidly brainstorming, and rattling off 20 sketches of possible parts I could use to assemble my puzzle cube. From those 20 sketches I then browsed to see which 5 parts I could then use to make up my puzzle cube. I did this by looking for parts that fit together, interlocked, etc. , then came up with the 5 parts I would use. My 5 parts I would then use were my green part , my orange part , my brown part , my red part , and my blue part (as modeled and described in the above segments). At this point I knew which pieces I would use, Now I had to develop the solution. I developed the solution by modeling all the individual parts on .ipt and .idw files on Inventor and creating a flip book sketch to show what the puzzle cube assembled would look like. After this I had to construct and test a prototype. To do this, I first created an assembly file in inventor by placing all the individual .ipt files in the assembly file and then constraining them to form the cube. I then physically constructed the puzzle cube by building and coloring all the individual parts then simply making sure they would form together correctly (as a 3x3 cube) so the person solving it could solve it successfully. Next, I had everything finished and it was time for me to evaluate the solution. I evaluated the solution by having 5 people solve my puzzle cube and record them while doing it; this way I would know if my cube was not to simple, not to difficult, and fit together correctly. After evaluating the solution I knew that I was finished with the project and I had completed it successfully.
Despite the ultimate success of my project I still had some difficulties when in the works of completing it. The thing that was probably the most difficult for me was probably using Inventor. Inventor was difficult for me because even though I had some previous experience using it, I still had some trouble with constructing the assembly file. Constructing the assembly file was difficult for me because I had never constrained several complex pieces, so this was very time consuming in regards to the time span I had to complete the project. If I could do anything differently when completing my puzzle cube project, I would probably simply take my time a little more when working on it so I wouldn't have to go back and take time to fix the mistakes I made while rushing. Despite all, I am very happy with final and end result of my puzzle cube project.
